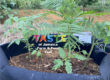
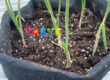
Grow bags are fabric containers used to grow plants instead of traditional pots or in-ground beds. They’re popular with beginners because they’re simple, affordable, and forgiving if you make mistakes.
This guide explains what grow bags are, why they work, and exactly how to use them step by step.
What Are Grow Bags?
Grow bags are soft containers made from breathable fabric, usually felt or polypropylene. You fill them with soil and plant directly inside, just like a pot.
Why gardeners like them:
-
Better drainage than plastic pots
-
Healthier roots due to air pruning
-
Lightweight and easy to move
-
No cracking or breaking
-
Easy to store when not in use
They work well for vegetables, herbs, flowers, and even small fruit trees.
Step 1: Choose the Right Size Grow Bag
Size matters more than many beginners expect. Plants need enough room for their roots to grow.
Common sizes and what to grow:
-
1–3 gallons: Herbs, lettuce, green onions
-
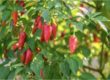
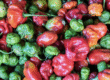
5 gallons: Tomatoes, peppers, potatoes
-
7–10 gallons: Cucumbers, zucchini, bush beans
-
15–20 gallons: Small fruit trees and shrubs
When in doubt, go a size bigger. Extra space rarely causes problems.
Step 2: Pick a Good Location
Grow bags need the right environment to perform well.
Look for a spot with:
-
6–8 hours of sunlight for most vegetables
-
Good airflow to reduce disease
-
A surface that can get wet, since water drains freely
They can sit on balconies, patios, driveways, grass, or soil. If you’re placing them on concrete or indoors, use a tray underneath to catch excess water.
Step 3: Use the Right Soil
Do not use garden soil. It’s too dense and doesn’t drain well in containers.
Instead, use:
-
Potting mix made for containers
-
A blend of potting soil and compost
-
Optional additions like perlite or coco coir for better drainage
Fill the bag to about 1–2 inches below the top. Press the soil down lightly but don’t pack it tightly.
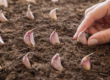
Step 4: Plant Seeds or Seedlings
You can plant directly into grow bags.
For seeds:
-
Follow the depth and spacing instructions on the packet
-
Water gently so seeds stay in place
For seedlings:
-
Dig a hole slightly larger than the root ball
-
Set the plant at the same depth it was growing before
-
Fill in soil and press lightly around the base
Water thoroughly after planting.
Step 5: Water Correctly
Grow bags dry out faster than plastic pots because the fabric allows air to pass through.
Watering tips:
-
Check moisture daily, especially in warm weather
-
Water until you see excess draining out
-
In hot conditions, watering once or even twice a day may be necessary
If the bag feels light or the soil surface is dry, it’s time to water.
Step 6: Feed Your Plants
Because water drains quickly, nutrients also wash out faster.
Simple feeding options:
-
Add compost every 2–3 weeks
-
Use a liquid fertilizer every 7–14 days
-
For fruiting plants, choose a fertilizer with higher potassium
Start with small amounts and increase only if needed.
Step 7: Ongoing Care
Basic maintenance keeps plants productive:
-
Check leaves regularly for pests
-
Remove yellowing or dead foliage
-
Rotate bags so plants grow evenly
-
Support taller plants with stakes or cages
If growth slows or roots start circling, the plant may need a larger bag.
Step 8: End-of-Season Care
When the season is over:
-
Remove old plants
-
Refresh or replace the soil with compost
-
Wash the grow bags with water and mild soap
-
Let them dry completely before storing
With proper care, most grow bags last several seasons.
Common Beginner Mistakes
-
Using garden soil instead of potting mix
-
Choosing bags that are too small
-
Letting soil dry out completely
-
Forgetting to fertilize
-
Placing bags in low-light areas
Avoid these issues and grow bags become one of the easiest ways to garden.
Final Thoughts
Grow bags are a great option for beginners. They’re flexible, low cost, and simple to manage, even if you don’t have a yard. With sunlight, good soil, and regular watering, you can grow healthy plants almost anywhere.